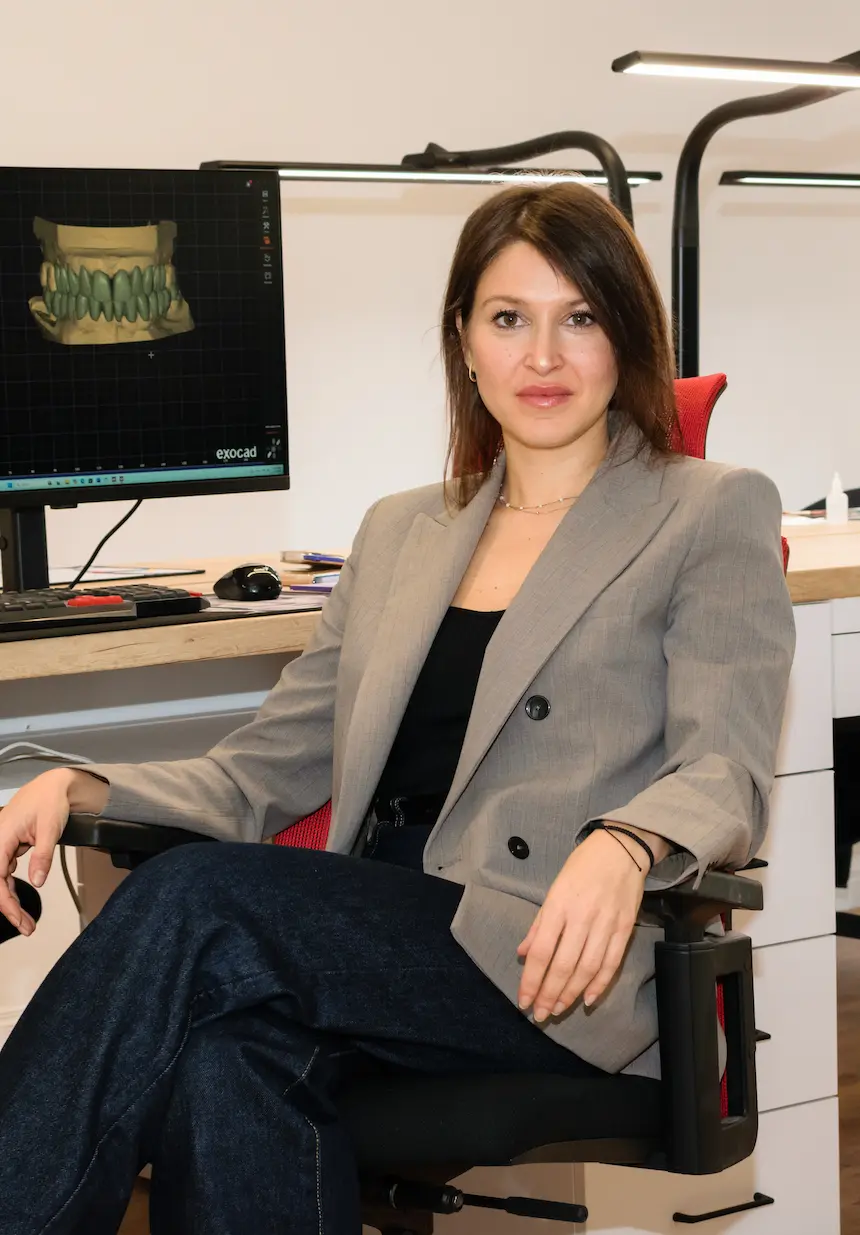
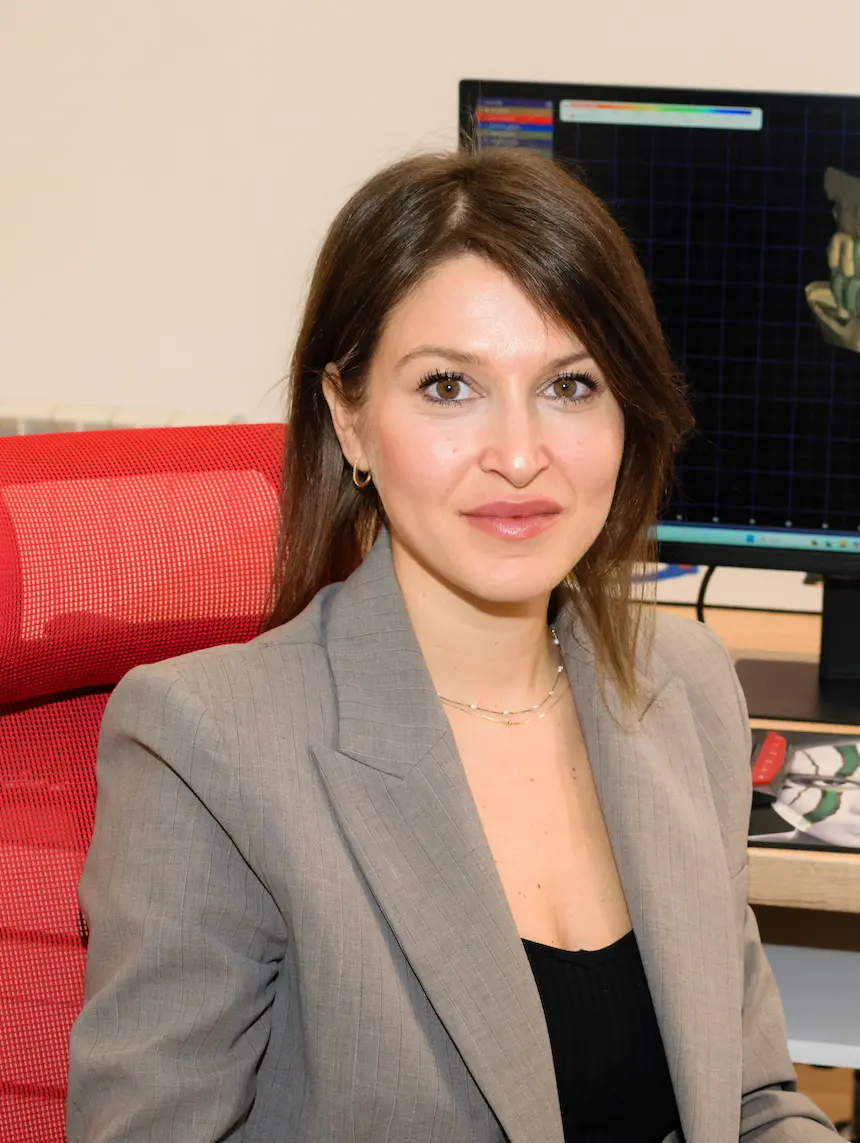
Aleksandra Simonovska designing a case in Exocad at her workstation
Master program · Starts 24 September

Exocad is not learned by watching.

You learn it by designing real cases, with a mentor next to you. 83 lectures, three modules, 12 weeks.

18+ years of experience
5,000+ designed restorations
83 lectures across 3 modules
15+ real cases
From me to you

Where are you starting from?

Four starting points, one program. Find yours below, and you will see exactly where you come in and what comes out the other side.

She had never opened Exocad. Today she designs cases for a clinic on her own.

When she finished her studies she wanted to work in digital dentistry, and very quickly found out the degree was not enough. She did not know where to start. She had never worked in Exocad. She wanted to learn, but had nobody to show her.

She was afraid she would not be good enough. That everyone around her knew more. That she would stay stuck at the beginning.

I hear this from almost every student in dental technology. Everyone wants to work digitally, but they do not know where to start, they have no support and no system. They try alone, lose time, and end up believing the problem is them. The truth is they are not short on talent, they are short on real guidance.

So we started from the fundamentals and moved step by step, the basics first, then gradually more demanding cases. Everything had an order, so she never felt lost, and at no point was she on her own. After the program we carried on with individual work.

The biggest change was not that she learned Exocad. The biggest change is that today she believes in herself.

You are not starting from zero. You are starting with everything you already know.

One of the biggest misconceptions I hear is "I am a beginner in Exocad, so I am starting from zero". That is not true.

If you are a student or already working as a dental technician, you already have knowledge. You already know what good anatomy is. You know what a crown should look like. You know how much contacts, occlusion and function matter.

The problem is not that you do not know. The problem is that nobody has shown you how to carry that knowledge into the digital world. That is why so many people think digital dentistry is something entirely new, when it is a continuation of everything you have already learned.

In the program we do not just learn where the tools are. We work step by step, on real cases, until you naturally start thinking like a digital dental technician. That is when Exocad stops being software that intimidates you and becomes the tool you show your knowledge with.

Once you stop thinking about where to click, you start thinking about how to make a good design.

The most expensive decision is not investing in yourself. It is staying where you are.

Maybe you think it will all fall into place in time. That someone will find a moment to show you. That you will gradually pick up everything you need at work. Usually it does not go that way.

The days pass. The months pass. And you are still waiting for someone to show you where to start. You still wonder whether you are good enough. You still turn down cases because you do not feel sure. You still watch videos and try to connect it all on your own.

And the hardest part, you watch others move ahead while you stay in the same place. Not because you are not capable, but because you have no clear system and nobody guiding you.

In these three months you get a clear system, hands-on work on real cases and my full support. I take you step by step, so you know what you are doing, why you are doing it, and how to turn that into confidence. Yes, the program is an investment. But you pay a far higher price losing another year waiting for someone else to teach you.

The biggest investment is never the program. The biggest investment is the decision to finally stop standing still.

The software does not give you the investment back. The knowledge you turn into good work does.

If you invest in yourself every day and never stop learning, you will not only learn Exocad. You will build knowledge nobody will ever be able to take from you.

Knowledge that opens more opportunities, gives you the confidence to take on more demanding cases, and helps you build the career you want.

With every new case you will get more sure of yourself. With every finished design you will raise your own value as a dental technician. And that is exactly why the investment you make in yourself comes back to you again and again.

Not because you own Exocad. But because you know how to create quality, to think like a digital dental technician, and to deliver work that others value, recognise and are willing to pay for.

Plenty of people can buy the software. The knowledge, the confidence and the quality you build in yourself are what make the difference.

You have read the four stories. Now tell me yours.

Every good digital dental technician was a beginner once. All they needed was someone to show them where to start.

Book a call
Why a program, not tutorials

Watching and doing are not the same thing.

You watch a video, everything looks easy. Then you open a real case, nothing works the way it did on screen, and you find out about the mistake only once a complaint arrives.

On your own, through tutorials
You watch, but you don't work The problems only show up once you start on your own, on a case that is waiting.
You ask, then you wait An answer in three days, and the case is already finished, finished wrong.
You learn from complaints The mistake costs you time, material and the clinic's trust.
With a mentor, on real cases
15+ cases, hands-on Crowns, bridges and implants from real clinics, not internet simulations.
Correction in the moment I correct you while you work, not after the case has gone to milling.
83 lectures in order Every module builds on the last, with a recording after every session.

From beginner to confident designer in 3 months

01

Hands-on lectures - you work while you learn

83 live online lectures, each with a hands-on task. You design on the computer while the mentor guides you - and every session is recorded and published to the platform, so nothing is lost.

  • 83 live lectures, each with a hands-on task you complete right away
  • The recording of every session waits for you on the platform - rewatch any step
  • From your first crown to All-on-X - structured, step by step
  • The mentor watches you and corrects you personally, case by case
  • By the end you design crowns, bridges, inlays and onlays independently
  • A certificate of acquired knowledge as proof for clinics and employers
02

Practice on real digital projects.

15+ carefully selected real projects for step-by-step learning. Crowns, bridges and implants - the same challenges you meet in everyday dentistry. The mentor corrects you live while you design, so mistakes get fixed immediately.

  • 15+ real digital projects used by professionals - not internet simulations, but a carefully chosen workflow.
  • Crowns, bridges, implants - the same challenges you face every day in real dentistry.
  • The mentor corrects you live while you work - mistakes are caught and fixed immediately, without waiting days for feedback.
  • You build a portfolio of real designs you can show to clinics and potential employers.
  • 1 session a week × 2+ hours - intensive enough for real progress, without disrupting your work day.
03

Everything on the platform + a professional relationship with your mentor

One login and everything is there: the course guide, the recording of every session and the working files we design on. After the program, a professional relationship with Aleksandra for collaboration, consultations and support on complex cases.

  • The course guide on the platform - read it on screen while you design, or download the PDF and print it
  • The recording of every session, added right after we finish - rewatch any step
  • The working files from every session, ready to download and design on yourself
  • Exact parameters for every material: cement gap, margins, minimum thicknesses
  • A troubleshooting guide - when something's wrong, the answer is a page away
  • Your access stays open through the program and for a period after it ends
  • The relationship doesn't end with the program - Aleksandra stays a professional contact
  • The option to collaborate on cases and get professional work done when you need it

This isn't a program for watching. This is 3 months of online work with a mentor on real cases.

Book a call

The complete program

3 modules. 83 lectures. 36+ hours.

From opening Exocad for the first time to designing All-on-X independently. Each module builds on the last - you always know exactly where you are and what's next.

Mastering Exocad Fundamentals - Module 1
Module 1 36 Lectures 4 Hours

Mastering Exocad Fundamentals

Designed for complete beginners. Build a solid foundation in Exocad with comprehensive coverage of the core tools, workflows and design principles.

Introduction

This introduction explains why Exocad became the standard in digital dentistry and how the program is structured for step-by-step learning. You'll meet the instructor and her background, get an overview of the available versions, licenses and add-on modules, and guidance on choosing the right reseller for ongoing support.

Hardware requirements for working smoothly in Exocad

To work smoothly in Exocad you need to meet the minimum hardware requirements, including enough RAM and a suitable graphics card. You'll learn how to choose between a laptop and a desktop based on your needs, and what limitations exist when working on a Mac.

Creating a case and the basics of working

This part walks you through creating a new case and navigating the Exocad interface. You'll learn how to add patients, organize projects, select teeth, restorations and materials, and work with crowns, bridges and implants. You'll also master using additional scans, setting parameters for a precise design, and techniques for saving, copying and sharing cases.

File types and checking scans

You'll understand the differences between the STL, PLY and OBJ formats most commonly used in digital dentistry. Learn how to review and validate scans before you start designing, and how to catch potential problems early.

Hotkeys for faster work

Master the most useful keyboard shortcuts every Exocad beginner needs. You'll learn how to quickly hide and show parts of the model and significantly speed up your workflow.

Wizard Mode and Expert Mode

Wizard Mode is ideal for beginners because it provides guided, step-by-step work. Over time you'll move to Expert Mode, which gives full control over the design, and this part explains when and how best to make that switch.

Scan orientation and fixing flipped meshes

Learn how to correctly select the meshes for the working model and antagonist, and how to correct an incorrectly oriented scan. This part covers working with 3D models, including rotating, zooming and moving, as well as recognizing orientation from the color of the triangles.

3D Data Editor: editing scans

Learn how to edit and clean up scans before you start designing. This part covers removing unnecessary parts, repairing holes in the mesh, and preparing a clean working model for a precise result.

Margin detection: tools, tips and tricks

This part covers the techniques for automatic and manual margin detection in Exocad. You'll learn how to adjust the points for a precise margin line and how to optimize the lighting and view for better visibility.

Crown Bottom and achieving a precise fit

Understand the parameters for a good fit, including cement gap and the different zones. You'll master the boundaries (horizontal, vertical, angled), the undercut and milling options, and the adjustments for crowns, veneers and other restorations.

Insertion axis and the ideal direction

Learn how to determine the best insertion direction for the restoration. This part explains how to minimize undercut areas around the margin and how to track changes in real time.

Minimum thickness and insufficient preparation

Understand the minimum thickness required depending on the material type and the tooth being restored. Learn how to check the occlusal space before making corrections.

Tooth placement and choosing morphology

This part walks you through choosing a tooth model from the library and the positioning techniques, including rotating, dragging and scaling. You'll also master the free-form tools for final shape corrections.

Free-Forming: shaping tools

The free-forming tools let you add, remove and smooth the surface of the design. Learn how to adjust cusps, ridges and contours, and how to control spacing and contact points.

Saving and merging a design

Learn how to properly finalize and merge all parts of your design. This part covers checking the STL for 3D printing and the differences between the restorative and implant workflows.
Setting up and creating a lingual band

Understand the differences between an offset coping and an anatomical crown, and learn how to add antagonist and gingiva scans. This part covers mesh alignment, designing a lingual band with the correct angle and height, leaving room for ceramic layers, and finalizing the project.

Intaglio settings and predictable results in Exocad

Master inlay and onlay design step by step, including material selection, files and the anatomical model. You'll learn to check the fit with Show Distances, make free-form adjustments while preserving morphology, use TrueSmile to visualize fissures, and apply cutting and smoothing techniques for a proper fit.

A fast workflow for symmetrical results with the Copy Tooth function

Learn the Mirror function for creating symmetrical anterior crowns and how to copy and mirror models from the scan. This part covers Advanced Placement for precise symmetry, using custom views and a grid for accurate positioning, TrueSmile for visual verification, free-forming techniques for smoothing and contours, and a final check of the contact points.

Setting up the case and the insertion axis

Learn how to design a bridge with anatomical crowns and a pontic, including margin detection and the insertion axis. This part covers handling cases with tilted teeth and simulating reduction for the patient.

Library tooth placement

Master loading and selecting custom models from the libraries, and using custom views for easier placement. Learn how to align cusps, check volume, and use Show Contacts to verify contacts.

Free-forming and designing the pontic

This part covers final shaping and achieving occlusal harmony. You'll learn how to create a pontic bottom for hygiene without food traps, use the disk cutter for embrasures, and apply smoothing and anatomical detail techniques.

Connectors - different workflows for long-lasting results

Learn how to properly add and adjust connectors between the units of the bridge. This part covers choosing size, shape and position for maximum stability, using free-forming to achieve precise dimensions, and finalizing and saving the completed bridge.

Full Anatomy Reduction

Learn how to reduce for ceramic over a metal substructure, including depth control and excluding parts from the reduction. This part covers advanced options like lingual side and multilevel reduction, minimum thickness by material, free-form smoothing and connector adjustment, and returning to the full anatomical shape.

Buccal Reduction / Cutback for partial veneers

Master manually defining reduction areas and using scan transparency for easy adjustment. Learn how to manage contacts with neighboring teeth and apply free-form smoothing for final corrections.

Master model with extra dies

Learn how to access Model Creator and properly clean up the scans. This part covers Expert Mode, Model Alignment, model types and plateless options, height, rotation and tooth die parameters, and creating antagonist models.

Model with removable cut-out dies

Understand what cut-out dies are and why they matter in the workflow. You'll learn about Model Alignment, ditch parameters, gingiva mask, retention nubs, and generating STL files for 3D printing.

Explaining issues with Cut View, annotations and screenshots

Learn how to use Cut View to visually explain a case and measure distances between surfaces. This part covers adding text and arrow annotations for clarity, and creating screenshots for communicating with clients.

Sharing cases via HTML

Exocad enables 3D viewing directly in a browser without extra software. Learn how to select objects, set password protection, and easily share cases by email.

Sharing cases via PDF

Create documents that combine a 3D model and screenshots in one place. Adobe Acrobat enables interactive 3D viewing directly inside the PDF document.

Installing new tooth and implant libraries

Learn how to properly install new tooth and implant libraries. This part covers checking that the libraries loaded successfully in Exocad, and how to avoid common selection mistakes.

From setup to a finished restoration

This part presents a complete workflow for different restoration types, covering shape, thickness and minimum requirements. You'll work with single- and multi-unit cases, correcting scan errors, the margin line and its parameters, positioning and adjusting teeth, bridges, connectors and ceramic layers, as well as export and preparation for manufacturing.

Mastering Exocad Intermediate - Module 2
Module 2 28 Lectures 3.5 Hours

Mastering Exocad Intermediate

Advanced techniques for dental technicians with a working knowledge of Exocad. Learn to work with the virtual articulator, implants, wax-up design and temporary restorations.

Design basics and correct thickness

Learn how to design a bite splint with the virtual articulator, including parameters for stability and comfort. This part covers material selection and its effect on durability, correcting scan errors, correct thickness for bite durability, insertion direction for good retention, and free-form techniques for a smooth surface.

Virtual articulator: basics

Understand the process of aligning the upper and lower jaw and the differences between automatic and manual alignment. This part explains the occlusal plane, midline, the Bonwill triangle, choosing an articulator type, the Bennett and condylar angles, and the importance of cleaning the scan before simulation.

Functional adjustment

Master Dynamic Adaptation for final corrections and the techniques for guiding teeth through the canines and incisally. Learn how to remove oversized contacts, use smoothing and flatten for comfort, check movements and contact coloring, and apply these principles to crowns and bridges.

Manually opening the bite and increasing VDO

Understand the basics of VDO (vertical dimension of occlusion) and the differences between Correct Antagonist and Virtual Articulator. This part covers the impact of VDO on bite splints and complex cases, how to avoid problems with an incorrect VDO, the correct sequence (alignment → articulation → simulation), and the basic parameters for a stable design.

A simple workflow for designing a custom tray

Learn the process of designing a custom tray step by step, and the differences and similarities with a bite splint. This part covers the offset value for comfort, avoiding undercuts for good retention, insertion direction and thickness, and drawing the margin and adding a handle.

Using attachments for open trays and complex designs

Master using Tab Attachments to add parts and working with the attachments library. Learn positioning techniques (moving, rotating, sizing), the Cut on Gingiva and Allow Any Changes options, loading a 3D file as an attachment, and the Subtract function for creating holes for implants.

A simple workflow for designing Eggshell Crowns

Learn how to design an eggshell crown in dentalDB, including tooth selection and positioning. This part covers automatic and manual tooth splitting, the importance of an accurate margin line, handling low-quality scans, free-forming for a natural look, base design parameters, and using tooth libraries.

Designing a temporary Eggshell bridge and virtual tooth extraction

Master creating an Eggshell bridge without a tooth library, and the technique for virtually extracting a tooth for the pontic. Learn how to shape the design toward the gingiva and cervical area, manage interproximal contacts, manually extract a tooth in Expert Mode, and choose materials for proper connectors.

Understanding scanbodies

Understand the implant process in digital dentistry and the different types of implants, abutments, scanbodies and analogs. Learn about the role of scanbodies in determining implant position and type, compatibility between different brands, recognizing scanbodies by shape, and using implant libraries.

Custom Abutment Case

Understand the differences between a custom abutment and a screw-retained crown, and the DentalDB workflow for choosing material and scanpost. This part covers correctly placing the scanbody, aligning meshes for accurate detection, specifications for tapered implants, platform and transgingival height, and checking the abutment height.

Emergence profiles of custom abutments

Learn what an emergence profile is and why it matters for a successful restoration. This part covers Definition Tools for manual definition, free-form for the base of the abutment, measuring the distance from the gingiva by color, secondary insertion direction for fit, and final adjustments.

Screw-Retained Crown

Master choosing material, tooth and the screw-retained option, and placing the scanbody with transgingival height. Learn about best-fit matching for interocclusal space and designing the emergence profile and crown, as well as designing without a scanbody using only the Titanium Base and changing the implant type.

How to change the implant type or Titanium Base

How to change an implant or titanium base without starting the project from scratch. How to adjust the transgingival height and repeat the best-fit matching. How to fix deformations in the cervical area with free-form smoothing. How to move from a custom abutment and crown to a screw-retained crown.

Setting up a wax-up case in Exocad

Learn how to set up a digital wax-up for veneers and rehabilitations, including the Anatomic Pontic choice in dentalDB. This part covers using photos in Smile Creator for personalization, strategic planning of the restoration and material, positioning and orienting STL files, and correcting defects from a plaster scan.

Setting up Smile Creator for wax-up

Master setting up and aligning photos, and the importance of professional dental photography. Learn how to align the points between photos and 3D scans, work with the lip lines, midline, interpupillary line and proportions, and choose an anatomy for a realistic design.

Wax-up design tips and tricks

Learn Wizard mode for a personalized smile design and placing teeth according to the patient's wishes. This part covers scaling for ideal proportions, custom model tooth features, free-form for a precise fit against the gingiva, mirroring teeth for a symmetrical design, and Hot Keys for quick corrections.

Gingivectomy simulation and finalizing

Master free-forming for final adjustments and adapting the library to the patient. Learn how to remove volume for veneers, use the disk cutter to separate meshes, and save the wax-up as an STL.

Setting up the case

Learn how to design veneers using the wax-up as a guide, including material selection and milling settings. This part covers loading scans and orientation, checking the margin line, insertion direction without undercuts, and setting the thickness.

Following the wax-up and troubleshooting

Master loading and aligning a previous wax-up and correcting minimum thickness. Learn free-form techniques for adding volume, checking contact points, and final corrections before saving.

3D-printed model with room for implants

Learn how to access Model Creator from dentalDB or a finished project, and use Plateless Model with Extra Dies for implants. This part covers placing scans and implant analog parts, checking implant libraries, Pedestal Height and Horizontal Offset parameters, the gingival mask, and generating models for the upper jaw and antagonist.

Adding attachments and markings

Master preparing a model for wax-up design and aligning it with the occlusal plane. Learn about pedestal height, adding and adjusting attachments, and the merge, save and file-location process.

Closing the abutment

Learn how to replace the screw channel with an abutment for a more esthetic and functional result. This part covers the steps for closing an abutment in Exocad and correct positioning for an optimal final design.

Split Bridge Design

This part covers a solution for non-parallel abutments using Expert Mode and the Bridge Split option. Learn about gap size and milling bur parameters, and how to work with the insertion axis and profile position.

Opening a project from another computer

Learn which folders are needed to transfer a project (.dentalproject and .dentalCAD). This part covers opening projects created with different systems such as 3M, iTero and TRIOS.

Saving resin when printing

Learn about correctly setting align and height, and adding a base with patient information. This part covers closing holes in the mesh and creating a hollow model to use less resin.

Mastering Exocad Advanced - Module 3
Module 3 20 Lectures 3 Hours

Mastering Exocad Advanced

Specialized techniques for complex cases. All-on-X protocols, full oral rehabilitations and advanced Model Creator features.

Setting up a hybrid crown and implant case

Learn how to use DentalDB for a full oral rehabilitation with a different restoration type for each tooth. This part covers the virtual articulator for increasing VDO, creating a new bite-scan relationship, choosing the titanium base and transgingival height, margin detection, and placing teeth in the upper jaw.

Tooth placement tools, tips and tricks

Master the tooth placement tool for fast placement and the differences between chain mode and manipulating a single tooth. Learn about the fixed bow for simultaneous movement, controlling minimum thickness, buccal volume and length, free-form occlusion corrections, copying teeth for symmetry, and grids for checking proportions.

Free-form shaping and finalizing

Learn techniques for adding volume and correcting detail, as well as integrating the wax-up mesh with the scan. This part covers achieving correct occlusion and a balanced plane, tooth parts for correcting root angle, using pre-op scans as a reference, cutting intersections, adapting pontics toward the gingiva, the virtual articulator with Bennett and condylar angles, Expert Mode for faster corrections, and Model Creator for final models.

Basic preparation of an All-on-X case (both jaws)

Learn which elements are needed for an All-on-X case, including scans, implants and scanbody. This part covers setup in DentalDB, using wax-up teeth instead of crowns and bridges, virtual gingiva, placing teeth in both jaws, the wax rim, aligning implant analogs, and the virtual articulator for correcting the bite.

Tooth proportions and functional occlusion

Master choosing the library for the upper and lower jaw and achieving correct tooth proportions. Learn how to align the midlines and occlusal contacts, measure for symmetry, use free-form for small corrections, and the articulator for checking movements.

Designing esthetic, hygienic gingiva

Learn how to create virtual gingiva with a natural look, step by step. This part covers gingiva modeling tools, providing volume around implants for strength, merging the upper and lower jaw, and checking and correcting intersections.

Reduction and preparation for ceramic

Understand the options for a monolithic design, cutback and full reduction. Learn about the importance of keeping a copy of the original design, cutback techniques for ceramic, reduction without weakening the structure, avoiding weak zones around implants, and final merging and saving.

3D models for All-on-X with implant analogs and gingival mask

Learn how to create a 3D model for a complex All-on-X case with correct tooth alignment and occlusal plane. This part covers implant analogs and model height, the gingival mask and retention pins, the articulator and incisal pin, and adding text and markings to the model.

Using Smile Creator without photos

Learn how to design a smile without a photo, using a screenshot instead. This part covers the frontal position for a more precise design and working with lip lines and position points.

Adding extra teeth

Learn how to check the settings in DentalDB before you start, and how to add more teeth for extra flexibility. This part covers Expert Mode for extracting a tooth from the STL and adding new teeth to an existing project.

Angled screw channels

This part covers a solution for the problem of a visible screw hole on the buccal side. Learn how to set up Exocad for angled screw channels, the importance of backing up default settings.XML, and setting the screw angle up to a maximum of 20°.

Missing scan bodies and mesh

Learn solutions for situations where no scan bodies are available, including using abutments and existing scans as a substitute. This part covers replacing damaged mesh data and alignment techniques for more accurate restorations.

16 yrs manual dental technology
5 yrs Exocad and digital workflow
Your mentor

Aleksandra Simonovska

18+ years in dental technology. 5,000+ designed restorations. Clients in Skopje, Zagreb, Prague and Belgrade.

Sixteen years of manual work and another five in digital technology - my advantage is precisely that I have both. I know what good form looks like in plaster, and I know how to get it in Exocad. I picked up the advanced techniques at specialized training in Zagreb and at IDD, and now I pass them on directly.

The training is built around practical projects, individual mentoring and support after the program ends too - so you can apply what you are learning straight away, on the cases that come to you.

The philosophy is short: a good restoration means less time in the clinic and fewer complaints.

What she teaches
Crowns and Bridges Implants Smile Design All-on-X Inlay/Onlay Model Creator
“I learned Exocad through trial, error and a lot of complaints. I want to save you those frustrations - and get you to a point where every case that lands on your desk, you'll know how to solve it.”
Testimonials

What students say about the program

Dental technicians and dentists who now work independently.

Young dental technician

As a young dental technician, the beginner Exocad program was incredibly useful to me - well organized and focused on practical work, with the core workflow clearly explained. Aleksandra covered in detail every tool I need for everyday lab work. By the end I felt ready to work independently.

Beginner in digital dentistry

I came in afraid of digital work - I had worked manually for years. After the program I feel confident and ready to take on any digital project. Aleksandra guided me step by step and gave me her full attention.

Experienced manual technician

This was my first time taking part in a program like this, and the experience was truly wonderful. The atmosphere was positive and motivating, and I learned a lot of things I will definitely put to use. The program exceeded my expectations .

First digital program

Everything was explained simply, step by step, with a lot of hands-on work. I couldn't be happier - I recommend it both to beginners and to colleagues who have worked manually for a long time and want to go digital.

Manual → digital transition

Is the program right for you?

Ideal for

Dental technicians

Move to a digital workflow without months of frustration teaching yourself

Exocad beginners

Learn it right from the start, without picking up bad habits from YouTube

Dentists

Design chairside without waiting on the lab

Students and recent graduates

Start a career with Exocad skills - a special student program at the best price

Lab owners

Send an employee, get them back with the skills for faster, higher-quality work in Exocad

Not for

Users of other software

The program is exclusively for Exocad

Anyone without 6 hours a week

If you don't have 6 hours a week for practice, better to wait

Anyone looking for just a video program

This is hands-on practice with a mentor, not passive video watching

Frequently asked questions

No. If you've never opened Exocad, that's fine. The program is designed to guide you step by step from the first time you open it to complex cases. Most students start from zero.

Yes, you need to have Exocad installed on your laptop. If you don't, the program includes a Demo version that stays with you.

About 4 hours a week: 2 hours of hands-on session and 2 hours of homework. It fits easily around a regular job.

Everything runs online. You get a login to our learning platform, and each session we meet live and design together. Right after, the recording of that session goes up on the platform, along with the working files we used. The course guide sits there too - read it on screen or download the PDF and print it. Your access stays open through the program and for a period after it ends.

Every session is recorded and published to the platform, so you can watch what you missed and catch up in your own time. The working files for that session are there as well. Catching up is on you, but if something stays unclear, feel free to reach out.

After completing the program, all participants receive a certificate from Dental Design By Aleksandra confirming they successfully completed the Exocad program.

No program turns you into an expert overnight. But the goal is that after the program you can independently handle basic and moderately complex cases, and don't feel lost when you're given an assignment.

YouTube is a great resource. But there you watch someone else's process, without context and without answers to your questions. Here you work, ask questions, and get guidance like in a real lab.

Yes, you'll get a certificate. But honestly, the certificate doesn't get you hired. What gets you hired is what you know how to do. The certificate is confirmation - the skill is the value.

Because I don't teach you like a lecturer, but like someone who works with Exocad every day and knows exactly where students usually get stuck. My goal isn't to impress you - it's to prepare you.

The program is built around hands-on work. Watching without doing doesn't build confidence. Working with support does.

Deliberately limited. I want everyone to get attention and be able to ask about anything that's unclear. Quality matters more to me than numbers.

Challenging, yes. Overwhelming, no. Everything is explained step by step. If you put in the time and attention, you'll progress.

Yes, there's an option to pay in installments. Your spot in the group is reserved with a payment of 30% of the full price or the first installment. Book a call and we'll walk you through all the payment options.

Student program

Are you a student? Start your career with an edge.

Same program, same mentor, same 83 lectures, at the best price - specially for students and recent graduates.

Questions for students

It's made exactly for you. The program starts from zero - opening Exocad for the first time, basic navigation - and gradually moves to complex cases. Most students have no prior experience, and that's actually an advantage - you learn it right from the start, without bad habits.

Exocad is the standard in digital dentistry - labs are actively looking for people with these skills. You come out with a certificate, a portfolio of 15+ real cases, and practical knowledge. Past students have gotten hired specifically thanks to the Exocad skills they picked up in the program.

Yes. The program is designed to fit around your studies - 1 session a week for 2 hours plus homework. Many students combine it with their regular coursework without any problem.

No. The program includes an Exocad demo, so you practice on the software at no extra cost. You don't need to buy anything upfront.

Yes, there's an option to pay in installments. Reach out on WhatsApp or Viber and we'll walk you through all the options, including the student price.

Yes. The student program is 100% identical - same modules, same mentor, same real cases, same certificate. The only difference is the price.

The program first, the decision after
You talk to Aleksandra directly - not to a sales team.

Everything you get in the program, led by a mentor with 18 years of experience and 5,000+ designed restorations:

  • Module 1: Fundamentals (36 lectures) crowns, bridges, inlays, onlays - you design them independently, from scan to STL
  • Module 2: Intermediate (28 lectures) implants, veneers, wax-up, temporaries - you take on cases you used to turn down
  • Module 3: Advanced (20 lectures) All-on-X, full rehabilitations - the most complex cases, under control
  • Exocad demo license included - a Demo version that stays with you
  • 15+ real cases from the lab you build a portfolio for employers and clinics
  • Individual approach the mentor guides you personally through every case
  • Course guide + digital libraries on the platform, ready to download - the same tooth and implant libraries from Aleksandra's lab
  • Recordings + working files every session recorded on the platform, with the files from that session ready to download
  • Certificate + professional relationship proof of your skills, and a contact with your mentor even after the program
Next group 24 September

Early bird price - active now

The program starts on 24 September

Learn more about the program and get answers to all your questions - reach out on WhatsApp or Viber

WhatsApp Viber

Your spot is reserved with a payment of 30% of the full price or the first installment. Payment in installments is available.